For long-running tasks in your application, a pop-up message window can be raised to alert the users that the specific task may take a while.
This can be accomplished using a combination of ADF Faces components (af:popup and af:dialog) and some JavaScript code.
In this recipe, we will initiate a long-running task in a managed bean, and raise a pop-up for the duration of the task to alert us to the fact that this operation may take a while. We will hide the pop-up once the task completes.
Getting ready
----------------
You will need to create a skeleton Fusion Web Application (ADF) workspace before you proceed with this recipe.
How to do it
--------------
And jsf page:
How it works
--------------
In steps 1 and 2, we created a JSF page called longRunningTask.jsf and added a button component to it. When pressed, the button will initiate a long-running task through an action listener. The action listener is added to the button in steps 3 and 4. It is defined to a method called longRunningTask() in a managed bean. The implementation of longRunningTask() simply waits for 5 seconds (step 4). We have also ensured (in step 2) that the button component's partialSubmit property is set to true. This will enable us to call the clientListener method that is added in steps 5 and 6.
In steps 5 and 6, we defined a clientListener for the button component. The client listener is implemented by the longRunningTask() JavaScript method, added to the page in step 6. The longRunningTask() JavaScript method adds a busy state listener for the pop-up component (the pop-up itself is added to the page in step 7) by calling addBusyStateListener() and prevents any user input by calling preventUserInput() on the JavaScript event. The busy state listener is implemented by the JavaScript method busyStateListener(). In it, we hide the pop-up and remove the busy state listener once the event completes.
Finally, in step 7, we added the longRunningPopup pop-up to the page. The pop-up is raised by the busyStateListener() as long as the event is busy (for 5 seconds). We made sure that the pop-up's contentDelivery attribute was set to immediate to deliver the pop-up content immediately once the page is loaded.
To test the recipe, right-click on the longRunningTask.jsf page in the Application Navigator and select Run or Debug from the context menu. When you click on the button, the pop-up is raised for the duration of the long-running task (the action listener in the managed bean). The pop-up is hidden once the long-running task completes.
This can be accomplished using a combination of ADF Faces components (af:popup and af:dialog) and some JavaScript code.
In this recipe, we will initiate a long-running task in a managed bean, and raise a pop-up for the duration of the task to alert us to the fact that this operation may take a while. We will hide the pop-up once the task completes.
Getting ready
----------------
You will need to create a skeleton Fusion Web Application (ADF) workspace before you proceed with this recipe.
How to do it
--------------
- Create a new JSF page called longRunningTask.jsf based on any of the quick start layouts.
- Drop a Button (af:commandButton) component from the Component Palette to the page.
You may need to surround the button with an af:toolbar component. Using the Property Inspector, change the button's Text property to Long Running Task and set its PartialSubmit property to true.
- Create an action listener for the button by selecting Edit… from the Property Menu next to the ActionListener property in the Property Inspector. Create a new managed bean called LongRunningTaskBean and a new method called longRunningTask.
- Edit the LongRunningTaskBean Java class and add the following code to the longRunningTask() method:
- Return to the longRunningTask.jsf page editor. Right-click on the af:commandButton in the Structure window and select Insert Inside af:commandButton | ADF Faces….
From the Insert ADF Faces Item dialog, select Client Listener. In the Insert Client Listener dialog, enter longRunningTask for the Method field and select action for the Type field.
- Add an af:resource to the af:document tag.
Make sure that the af:resource type attribute is set to javascript and add the following JavaScript code inside it:
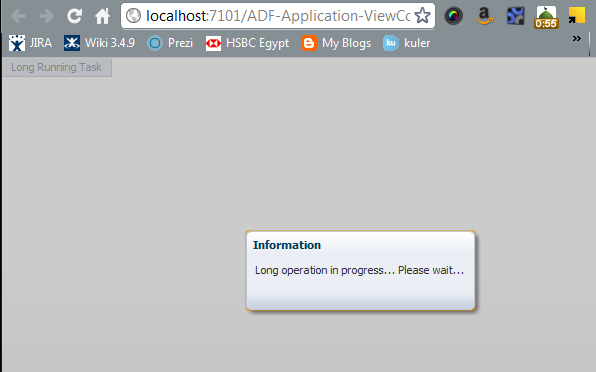
- Finally, add a Popup (af:popup) ADF Faces component to the page with an embedded Dialog (af:dialog) component in it.
Ensure that the pop-up identifier is set to longRunningPopup and that its ContentDelivery attribute is set to immediate.
Also add an af:outputText component to the dialog with some text indicating a long running process.
Your pop-up should look similar to the following:
And jsf page:
How it works
--------------
In steps 1 and 2, we created a JSF page called longRunningTask.jsf and added a button component to it. When pressed, the button will initiate a long-running task through an action listener. The action listener is added to the button in steps 3 and 4. It is defined to a method called longRunningTask() in a managed bean. The implementation of longRunningTask() simply waits for 5 seconds (step 4). We have also ensured (in step 2) that the button component's partialSubmit property is set to true. This will enable us to call the clientListener method that is added in steps 5 and 6.
In steps 5 and 6, we defined a clientListener for the button component. The client listener is implemented by the longRunningTask() JavaScript method, added to the page in step 6. The longRunningTask() JavaScript method adds a busy state listener for the pop-up component (the pop-up itself is added to the page in step 7) by calling addBusyStateListener() and prevents any user input by calling preventUserInput() on the JavaScript event. The busy state listener is implemented by the JavaScript method busyStateListener(). In it, we hide the pop-up and remove the busy state listener once the event completes.
Finally, in step 7, we added the longRunningPopup pop-up to the page. The pop-up is raised by the busyStateListener() as long as the event is busy (for 5 seconds). We made sure that the pop-up's contentDelivery attribute was set to immediate to deliver the pop-up content immediately once the page is loaded.
To test the recipe, right-click on the longRunningTask.jsf page in the Application Navigator and select Run or Debug from the context menu. When you click on the button, the pop-up is raised for the duration of the long-running task (the action listener in the managed bean). The pop-up is hidden once the long-running task completes.
